Eclipse -> Ant -> OC4J
Mucking around with Eclipse lately, I wanted to use the <oracle:> Ant tasks from the IDE.
OC4J comes with its own standard Ant distribution which has the <oracle:> Ant tasks already seeded within it. One option therefore was to swap the distribution of Ant being used by Eclipse with the one in the OC4J distribution.
But that seemed a little severe -- how about we add the <oracle:> tasks to Eclipse instead.
After a bit of trial and a bit more of error, I have it working.
In the end, the steps required to make it work are quite simple, with one major consideration: it's necessary to have an OC4J environment local to the Eclipse IDE.
The <oracle:> Ant tasks are packaged to run within the context of OC4J. The Manifest.mf file of the JAR files contain Class-Path entries which define the other required libraries. So take it as a given, that as a minimum you need an OC4J environment on the client. This can be from the oc4j_extended.zip or from the result of performing an Oracle Application Server installation.
The two JAR files of interest from OC4J that we need to add to Eclipse are:
- ant/ant-oracle.jar
- j2ee/utilities/ant-oracle-classes.jar
Now when I say add, I mean configure the Eclipse Ant class-path to be aware of these JAR files in their original locations -- not copying them into the Ant directories within Eclipse. The JAR files have relative Class-Path links in their Manifest.mf files, so copying them around into different directories will break them.
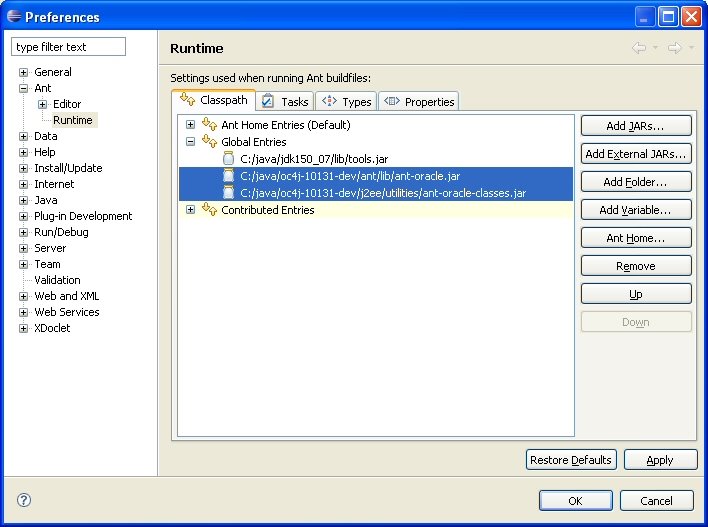
Once you have a Project, open the Windows -> Prefences dialog from the Menubar.

Select the Ant > Runtime node in the tree
Select the Classpath tab and the "Global Entries" node.
Click the "Add External JARS" button and add the two JAR files from the OC4J distribution.
That's it!
You can now define and use the <oracle*> Ant tasks within the Eclipse environment.
Here is an n example of using the <oracle:deploy> task to deploy an archive to an local OC4J instance.
<target name="deploy" depends="compile" description="--> description">Executing this target from the Eclipse Ant runner results in the application being deployed to the specified OC4J instance.
<oracle:deploy debug="true"
deployeruri="deployer:oc4j:localhost"
userid="oc4jadmin"
password="welcome1"
file="d:\temp\testit.war"
deploymentname="testit" contextroot="/testit"
bindallwebapps="default-web-site"/>
</target>
Eclipse Content Assistance
Once the <oracle> Ant tasks have been added, Eclipse can help you included them within build your Ant build files using its Content Assistance capability.
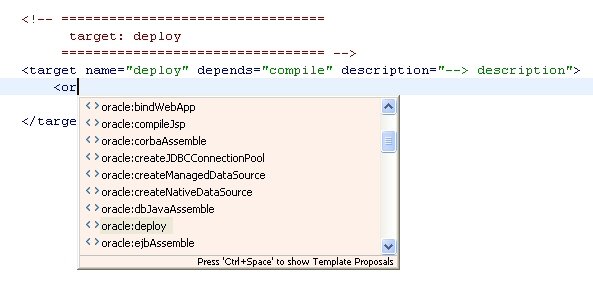
To see the list of <oracle> Ant tasks, simply type:
<ora> and press ctrl+space.
Eclipse will then display a list of all the <oracle:> tasks, which can be inserted into the build file by selecting the desired task.
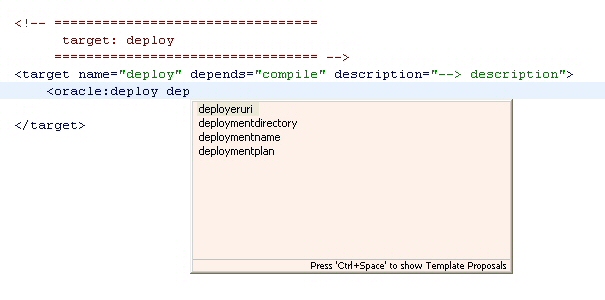
Once the task has been inserted, the attributes for the task can be viewed using the same content assistance mechanism.
Note: I found that the Content Assistance would not show the <oracle:> tags until I added one manually. This seems to force Eclipse to load the JAR file and become aware of the rest of the tasks. This could just be my experience, but if the <oracle:> are not showing up in the IDE as described, try manually seeding it with the example I showed above.